
Sampling The Sector
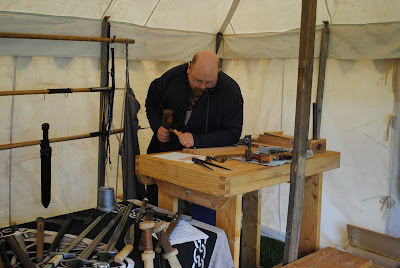
I don't drink a lot, I don't use any illegal substances, heck most of the time I even drive in the vicinity of the speed limit. I really only have two vices, (the naughty kind, not the attached to my bench kind) that occasionally get in the way of being an attentive husband, father, and employee. One of those is woodworking, the other is studying medieval history.


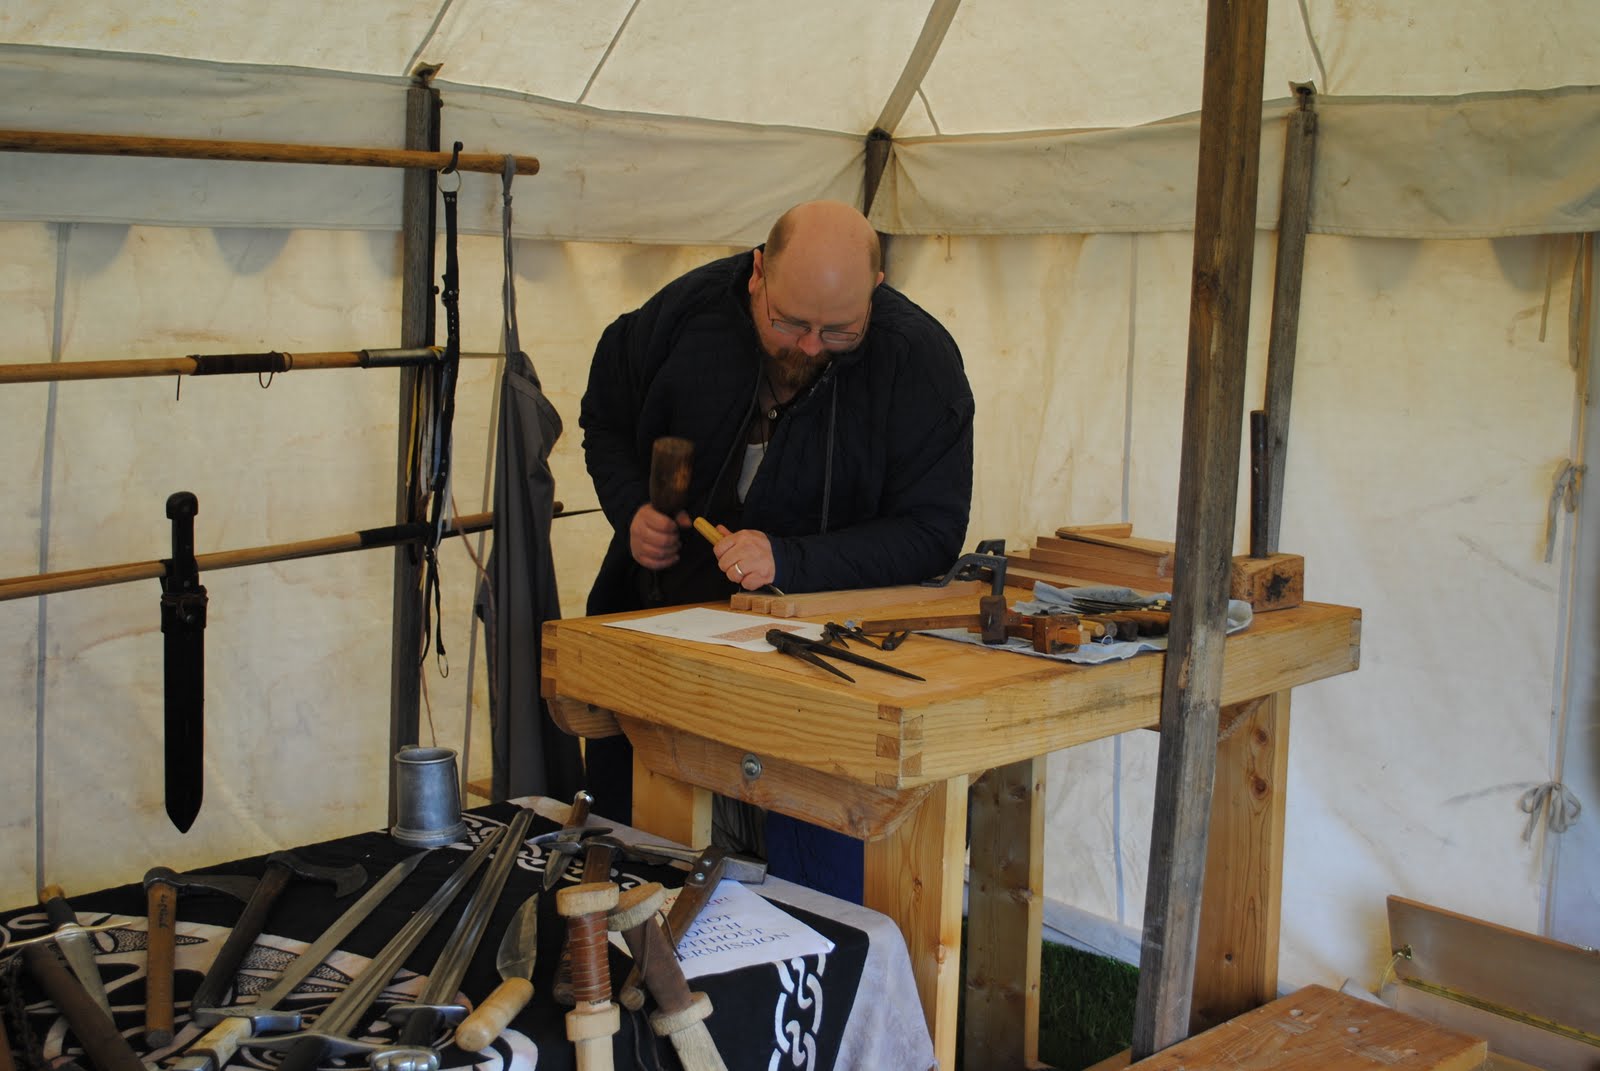
I gathered from the article that while one sector is functional, a pair of them can be very versatile. One about twice the size of the other. I chose a width for the larger sector and proceeded to rip the width from the narrow stock after marking it out with a marking gauge.

As I worked along I made myself pretty happy, a couple years ago when I started changing my game plan to hand tools there's no way I would have been able to pull off ripping a half inch off a board with a D-7. Now it really didn't seem like a big deal. After sawing I planed the edges first with my #6 for flatness followed by my #3 for smoothness.

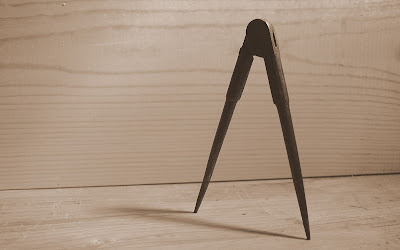
Now I had a good ol' pair of sticks to make the longer sector.

The shorter sector could be thinner dimensions so I ripped the two sides from one shorter section of stock.

Toplin's sector puts the hinges on the endgrain. I know he's probably smarter than me and there's gotta be a reason for it, but I had to go with what felt right to me and that was sinking the screws into side grain. This meant creating a little recess so the hinge will lay flush once installed

Then there comes the knife work breaking the sides into 13 equal sections. I cheated a little and used inch measurements for both sectors, The smaller sector has 13 divisions spaced at an inch and the larger has them at two inches. I measured them out and knifed the lines both on the top, then on the inside of the legs.
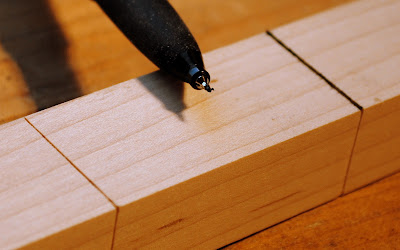
A very fine Sharpie pen was put to work darkening all the knife lines.

While I was working away I got to thinking about the layout squares I started building about this time last year and the decorative molding cut outs on the Roubo Square and English Layout Square and how they help make the tool attractive and increase the pleasure I get working with them. I decided to repeat the experience here with these sectors. I cut these ovolo silhouettes on the distal ends of the legs on both pair.

Towards the hinge end of the smaller I rasped out these simple covetto silhouettes.

And the hinge end of the larger sector received this bead detail.

Then came the time to number them one to thirteen. One the smaller I used standard Arabic numerals.

On the larger I decided to change it up and use Roman numerals. No particular reason, a little romance that's all.

One of the best things for me is when my two obsessions find common ground, then I can really geek out. this is probably why I've latched on well to panel carving, It's a drug that feeds both of my obsessions.
One thing I have always wondered about with medieval woodcraft is measuring, before standard empirical measurements. I get the idea of story sticks or string with knots at regular spaces. I understand the concept of measuring by finger, hand, and foot. I also get judging by eye and having a working knowledge of how proportions should work. I have played with all these things but there seemed like there was a missing piece to all of these, and I had my suspicions the mystery was contained in a pair of dividers.

I get the basics of a pair of dividers, transferring measurements and scratching arcs and circles, but I have always suspected that was only scratching the surface. I've never made it to Woodworking in America, but I know George Walker has taught a class there that connects the use of dividers to design furniture and I wish I could attend for that class most of all. (There are lots of other good reasons I with I could attend)

I am an avid follower of Mr. Walker's blog "Design Matters" blog and I like his articles in Popular Woodworking Magazine and he recently wrote a simple post on a tool rack he built for his shop without using any "measuring" in the sense that we have all been raised to be accustomed to. This connected me to an article written by Jim Toplin (George's co-conspirator on an upcoming book from Lost Art Press) in the June 2011 issue of Popular Woodworking Magazine called "Secrets Of The Sector."
I dug out my copy of the mag and re-read the article, and I'm not sure how I let it slip by me the first time. In the back of my head, everytime I saw a folding rule for sale I would think, "I should pick up a real cheap one I can sand down and convert to a sector" like Chris Schwarz did in this video. But after re-reading the article I couldn't let it pass me by again.

I stopped and picked up a small maple board from the closest box store the next morning. Why maple? It was one of the best bits of stock on the shelf that particular day, and I wanted something light colored and readable when I marked the lines and numbers.

I gathered from the article that while one sector is functional, a pair of them can be very versatile. One about twice the size of the other. I chose a width for the larger sector and proceeded to rip the width from the narrow stock after marking it out with a marking gauge.

As I worked along I made myself pretty happy, a couple years ago when I started changing my game plan to hand tools there's no way I would have been able to pull off ripping a half inch off a board with a D-7. Now it really didn't seem like a big deal. After sawing I planed the edges first with my #6 for flatness followed by my #3 for smoothness.

Now I had a good ol' pair of sticks to make the longer sector.

The shorter sector could be thinner dimensions so I ripped the two sides from one shorter section of stock.

Toplin's sector puts the hinges on the endgrain. I know he's probably smarter than me and there's gotta be a reason for it, but I had to go with what felt right to me and that was sinking the screws into side grain. This meant creating a little recess so the hinge will lay flush once installed

Then there comes the knife work breaking the sides into 13 equal sections. I cheated a little and used inch measurements for both sectors, The smaller sector has 13 divisions spaced at an inch and the larger has them at two inches. I measured them out and knifed the lines both on the top, then on the inside of the legs.

A very fine Sharpie pen was put to work darkening all the knife lines.

While I was working away I got to thinking about the layout squares I started building about this time last year and the decorative molding cut outs on the Roubo Square and English Layout Square and how they help make the tool attractive and increase the pleasure I get working with them. I decided to repeat the experience here with these sectors. I cut these ovolo silhouettes on the distal ends of the legs on both pair.

Towards the hinge end of the smaller I rasped out these simple covetto silhouettes.

And the hinge end of the larger sector received this bead detail.

Then came the time to number them one to thirteen. One the smaller I used standard Arabic numerals.

On the larger I decided to change it up and use Roman numerals. No particular reason, a little romance that's all.

A quck Danish Oil finish to give them a little protection and when they dry they'll be ready to work. I cannot wait to begin to play with these and explore the possibilities behind them. I know they're going to help me pull more of the mystery out of using my dividers and I'm excited about that. I'm going to see how many secrets I can unlock on my own before the Walker / Toplin book arrives on the scene. I'm excited to read that too, I hope we don't have to wait to long.
Ratione et Passionis
Oldwolf
For More Info:
Read George Walker's post "Design at the Point of a Tool"
Check out Jim Toplin's website.
Chris Schwarz also has a video on using a sector HERE


Nice design on your sector. I'll be taking the "By hand and by eye" Design course with Jim Tolpin in February, where we will make sectors and learn to use them. Let me know if you have come up with any questions by then!
ReplyDeleteI am very jealous. I would love to go to this class. I saw on the schedule there's a week long class with both Toplin and Walker in October. Now that would be an awesome opportunity.
DeleteIf something comes up I'll definitely drop you a line. Thanks for asking buddy.
Derek.
These look great Derek. And good on ya for dressing them up and making them look like fine woodworking tools instead of just two sticks with a hinge. I really like that!
ReplyDeleteOldwolf,
ReplyDeleteThanks for sharing! This tool is new to me. I am looking forward to experimenting with it. Crappy folding rule I never use, Watch out!
Very nice ones.
ReplyDeleteWhere did you start the measuring? From the pivot point of the hinge or from the end of the legs?
And did you step out (inch out in your case ;)) the inner side of the legs?