
Starting the Moxon Twin Screw Vise
There is a lot of work and joy in setting up a shop, finding some of my old power tool buddies has been interesting. But the big accomplishment is always in setting up the workbench and making decisions on the peg board. Well the big part is done and peg board is hung over the main workbench complete with hooks and tools. I may find myself modifying the layout some in the future, but probably not a whole lot.
 Infact it felt so good to have the main part of the shop set up that yesterday instead of working on organizing any more of the shop. I started making sawdust instead. OK so I'm not so good at this whole delayed gratification thing and besides the tools on the board were crying out to be put to use. Who am I to deny them.
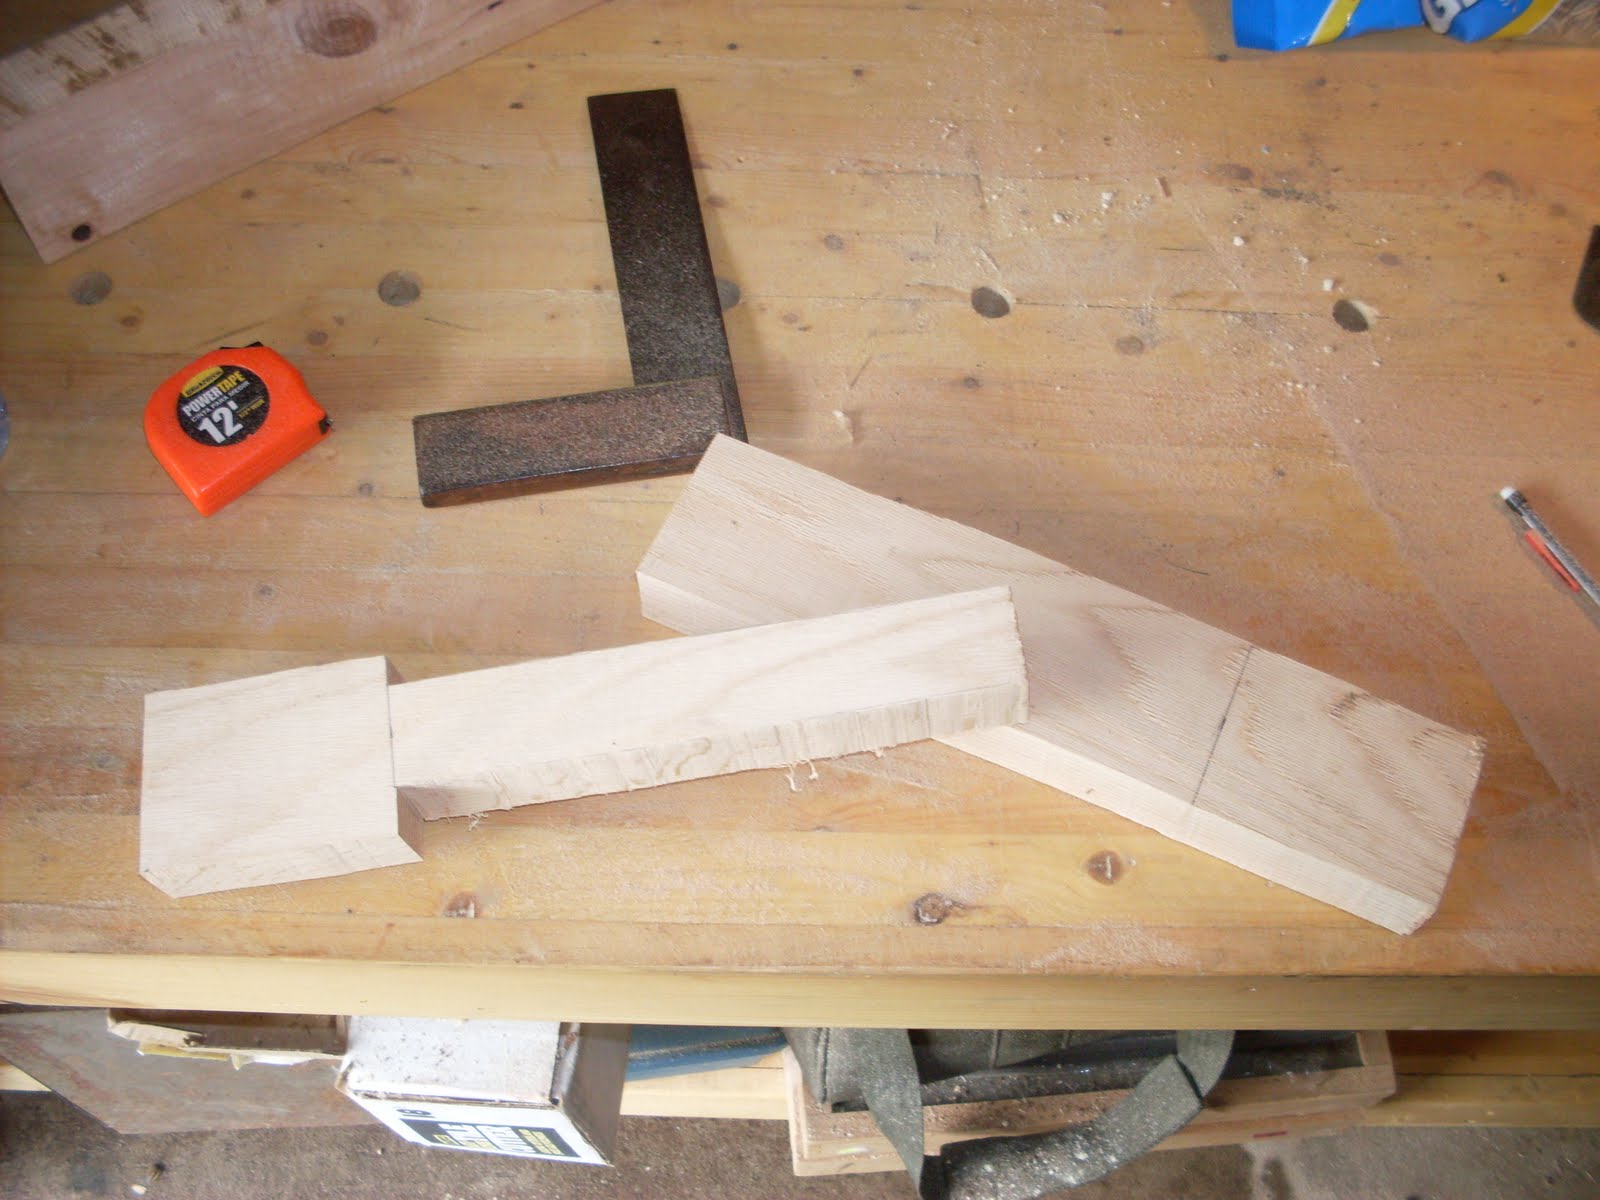
 Since one of the first things I had set up was the new lathe. I decided it was time to take it for a test drive and shape some of the remaining hickory I have from building the joinery bench to make a free standing double screw vise a la Moxon and Chris Schwarz. I took one of my hickory scraps, about 27" long 3" wide and 1 1/2" thick and crosscut it in half to two 13 1/2" sections. I measured out about 4" for the grip and then a 1 1/2" section down the center of the blank using the bandsaw.

I then marked out the centers and mounted the blank on the lathe.

Using a pair of calipers measured to 1 1/2" I turned the screw end of the blank down to a round, Why a 1 1'2" round, well I have two threading tools one is 3/4" diameter and one is 1 1/2" diameter. I actually bought them together off eBay but intentionally bought the pair for the 1 1/2" for this specific project.
I should explain that as far a lathe tools go I don't own a parting tool.So instead I used my roughing gouge to bring the blank down close to round by making a series of grooves of equal depths and then evening out the territory between the grooves. I used a roughing gouge and a skew cutter to bring the blank down to just a hair smaller than 1 1/2"
Maybe I will be more specific about the turning on the next blog post, I didn't take enough pictures to really explain this part as in depth as I should have. Look for more info on this soon.

You make the dowel you are going to turn just a little smaller than the diameter so there is some room for things to move. We are doing a tap and dye with wood and not steel. I have worked the tap with tight tolerances with the 3/4 inch tap and dye and the result is real work to turn and it makes this wonderful, high pitched banshee screech with every turn. If you're going to do this under size the screw blank by a little, not too much, just a little. What this really means is that if you want to turn some threads and you buy sized dowel for it instead of turning your own, then you should still spend a little time with some sand paper bringing the diameter down by a little, you'll be happy you did.

With the blank turned, it was time to cut the threads. I opened the thread box and checked the depth of the cutter, You want to start with a shallow cut first and make it deeper with a second pass if needed. Then you place the thread box over the blank and start turning. (I laugh now that I look at the picture I took, "Why yes that is a big ass bag of sunflower seeds, I prefer to call them 'Shop Fuel.'")

The only real trick it to start the cutter off slow and regular to you keep your threads square. With a sharp blade you don't need to add a significant amount of downwards force, the truth is once you have it started all you have to do is keep spinning it, The follow up threads will apply all the downwards force you need. (Apparently the sunflower seeds were relocated before this shot)

I wanted to test the quality of the threads before I went too much further so I cut a small section of red oak and drilled a hole in it with a forstner bit and 1 3/8". It's important to under size the hole you are going to cut with the tap as well. 1 1/2" will be the outside diameter of the threads, and you want to drill the hole for the diameter of the valley's between the threads. a 1 1/2" thread cutter will fall through a 1 1/2" hole without making a cut.
One other thing I think I should explain, the liquid or darker areas you can see on the wood being cut comes from "lubing" up the wood with a little 3 in 1 oil. I'm sure any type of light oil will work, maybe even a wax, but it is recommended to help ease the cut.

So then I turned to wooden "nut" onto the wooden "bolt" and the threads worked just fine. NO deeper cutting needed.

Before I quit the shop for the night I took some of the scraps from doing the initial cuts on the band saw and glued them to the handle end. Now I can shape the handle down into something round and more manageable. I should get to play with that some today.
But first I get to go to one of my favorite places in the world, about 30 minutes from my house is a smaller, mom and pop type lumber company that is excellent to deal with. Their name is Big River Lumber Company and they specialize in hardwoods. The customer service there is outstanding. I have dealt with lumber companies and driers before and they have only wanted to sell larger lots of wood, minimum orders of 100 or 250 board feet, and I don't have that kind of need or wallet. I'm a small one man production here. Big River has had no problem selling me one board of wood, they even brought me into the production area so I could pick it myself. I have never had that type of helpful response from other companies, (of course those were all out in Northern Maine and there were lots of other hurdles I faced when we lived there as well.) anyhow I'm headed out there to hopefully pick up some white oak. Buying wood is almost as good as buying new tools.
Cheers
Oldwolf


Comments
Post a Comment