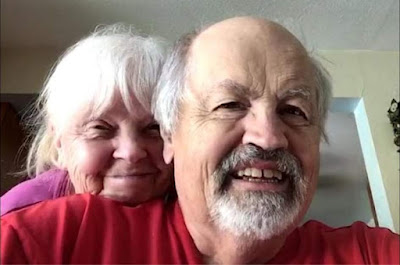
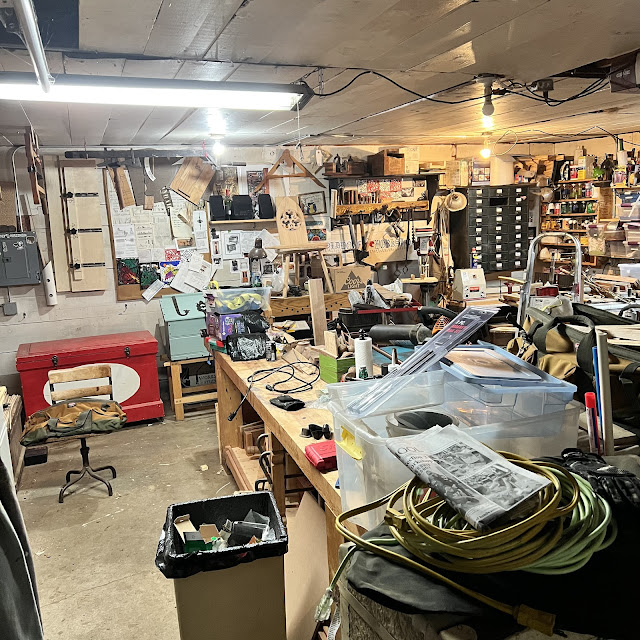
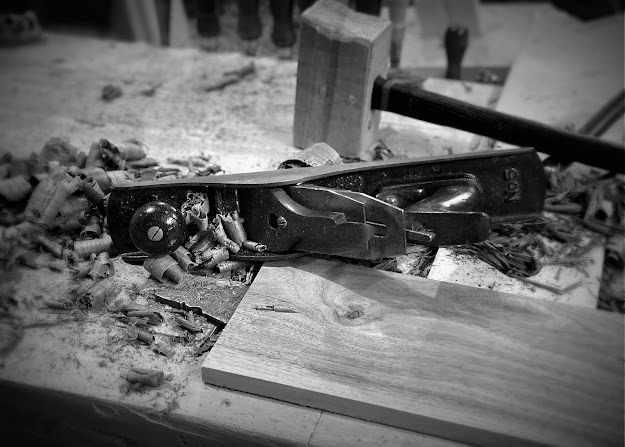
Saturday, March 17, 2012

Back to the Bible Box

I had finished carving the front of the new bible box . . .


 . . . and I had finished the sides.


It was time to start on the lid, period or not I enjoy carving the lids. It gives me a little chance to work on a larger piece and the lid can really draw the piece together. With that in mind I try to pull elements from both the front and the sides.


The thumbnail cuts from the sides and the opposing hearts from the front.


I had the main parts of the box finished.


But I had the inside of the box to worry about and I wasn't sure what to do. At the time I was preparing this piece to include in an art gallery show I'd been invited to. The show eventually canceled (But the good news is I secured the opportunity to carry my own show once I have enough pieces built up, It's gonna be a busy year for me I think) I wanted to do or try something different. 

In the middle of trying to figure it out I had the chance to take my oldest daughter to the Milwaukee Art Museum. I had an amazing day and took many, many, many pictures of their selection from the Chipstone furniture collection. I also got a look at this Game Chest, carved and inlaid and the inside was lined with marbled paper. 


I remembered marbelizing paper back in one of my old art classes, it wasn't too difficult of a thing to do. A few minutes searching the web and I found the recipes I needed. A little liquid starch and a little acrylic paint later and I had something to work with.


In case there is any interest I shot some video of the process.


The results inside the box can be stunning.


Ratione et Passionis
Oldwolf

A quick note: The music I selected for the video was performed by a friend of my Travis Oppelt, He is a great musician, writing and playing all the instruments in every song on his album "You'll Never Stop Me" under the band name TravAce. If you enjoyed the song in the video then support another starving artist and download the album at Amazon.com and iTunes.  You can see more of his stuff on YouTube as well.

TravAce on Amazon.com

See more on YouTube

Thanks again

Saturday, March 10, 2012

My Carving Set

Recently I posted some pictures of the lid for my most recent bible box on Google + and some discussion about woods for carving and tools followed. One friend, Brander Roullett, (who writes his adventures on one of my favorite blogs Badger Woodworks and who has been working down a similar path of 17th century carving techniques) suggested I put up a post about the carving chisels I use.

"Wow," I thought, "That's a pretty damn good idea."

So here we find ourselves, at the gateway to the executive tour of Oldwolf Workshop Carving Set. Please remain in your seats and keep your appendages within the confines of the ride at all times. No flash photography please and hold all your questions until the end.

First we'll start with the first two carving chisels I purchased. A pair of Pfeil chisels brought home from the Woodcraft store.


It turns out the 45 minutes I spent agonizing over the multitude of choices present on the "Wall Of Pfeil" turned out well. The "V" chisel was a no brainer, but getting the perfect sweep gouge was moderately tormenting. I'm still happy with my one choice. It gave me enough to start playing with carving.

In the next year Peter Follansbee released his first video on 17th century wood carving and I was raring to go. One of the area antique stores had a set of a dozen carving chisels hidden back in a corner, I had my eye on them for a long while and I finally couldn't resist any longer.


Half the set is made from 6 Bucks Brothers gouges. There isn't a whole lot of difference in the sweeps, in fact They are almost 3 pairs of twins. The shallow sweeps on the left easily see the most use of any gouges beyond my V tools. I think the previous owner favored them as well because the bottom of one handle is pretty beat up.


The remaining 6 from that set are a nice selection of old Miller Falls chisels. There is a couple different, deeper, gouge sweeps, including a couple smaller detail gouges, a goose neck chisel that is great for material removal, and a very elegant V chisel.


I did have to replace one ferule that was missing.


Then I have a small detail set of old Craftsman chisels. I only just recently got these off eBay and I haven't gotten to using them much yet, so the jury is out on whether they stay around or not.


Finally I have a small selection of tools let's call pattern tools. One of these is a simple nail set, The others are old tool steel I modified myself.


The tube was a leather punch, the cross shaped punch was an old beaten up alignment bar and the texture punches were an old beaten up center punch and cold chisel. You can read the post I wrote about creating the texture punches HERE.


I wasn't completely happy with the texturing punches when I first made them, somehow I believed the marks they were to make should have been more vivid. But I have a bit more carving under my belt now, and a whole lot more looking at pictures of period pieces and comparing them to my work and the punches really do hold up well.

Other tools that end up helping with my carvings are a scratch awl, sometimes to make a layout line and sometimes to make a round punched hole similar to what I do with the nail set or cross punch. Sometimes I also use a marking knife to carve in a fine detail or refine a line. The pencil helps because there are times I will take a period carving and use that as a jumping off point for my own direction, the pencil helps me layout my feelings and ideas without cutting into the wood, so I have a chance to refine the idea before I cut any wood.


Add a mallet, hammer, square, several dividers, a marking gauge, and a little time and practice and you too can be carving.


 In all reality the kit I've been able to assemble here is more than a beginner needs and I am certainly not advocating that you build a kit just like mine. Hell, most of my kit was collected by another person years ago and I was simply lucky enough get my hands on it. There are a couple more things I'd like to get my hands on like a couple chip carving knives, and a larger goose neck chisel. A hook knife and a couple bigger gouges like one would use in spoon making would also fit in well with this kit. Beyond that though I'm pretty happy where I'm at, After all, more chisels just means more sharpening and less carving.

I'd rather be carving


Ratione et Passionis
Oldwolf

Monday, March 5, 2012

Simple Curiosity


"Ours is really a simple craft. But it is a rich one, too. At its best, the simple becomes obvious; a band of small discoveries, strung like pearls on a thread of curiosity, lending richness to our work."

"Simplicity is the beginning of many fine things."

-James Krenov, "The Impractical Cabinetmaker"

Ratione et Passionis
Oldwolf

Wednesday, February 29, 2012

Kick Start

I'm not sure what it is about the beginning of the year, but I find it to be a very hard time to write about what I'm doing in the shop. In the past I thought it had to do with fighting the cold Wisconsin winters to get shop time, but this year I moved the shop to my apartment for the winter and I have been as busy as ever. So what I figured I needed was a kick start, a simple post to get me back up and running and tonight I finished off a quick project I thought would work well.

t started with my arming stand. Wait, what's an arming stand you ask? As many of you may know, (it comes up from time to time here) I spend a decent amount of time participating with a medieval reenactment troupe, this includes studying and practicing medieval combat techniques. This means I am the adult incarnation of nearly every twelve year old boy's dreams, I have my own armor, not a costume for Halloween, but real, steel, try and cut me and you can't, armor. And an arming stand is the place where I store and display my armor.


It's a simply constructed cross, quickly made from a 2x4 in an hour or so. I've made and given away several of them through the years, and I've named all of them. This one's nom de plume is Fritz. (As is "Fritz, Fritz, they killed Fritz, Those damn stinking yellow fairies they killed Fritz") Well Fritz's base had worked itself loose and I needed to repair it for the upcoming season and as long as I had it on the bench I decided to add some embellishment to the simple pine.


I decided I would use just two chisels, a "V" chisel and a gouge. Infact these were the first two chisels I purchaced and I was interested to see where I would go with them. I was kind of testing myself, I've added several more chisels since starting with these two and I wanted to check that I had gotten better, not just appeared so because of a better / more expansive selection of sweeps.


 I am a compulsive planner, this works in my favor a lot, but it can be confining as well. There has to be room for the spontaneous in art. So in contrast to my recent work, I just took the chisels and started to make marks, figuring it out as I went. Very liberating.


In about an hour I had finished up and started nailing the legs of the stand back together (with a little wood glue this time for longevity) No more just ugly 2x4 when I take the maile down to strap it on. Now there will be a little eye candy for me to come back to. Yes it will be hidden most of the time, but I'll know it's there.


I like the offset thumbnail cuts that run along the vertical axis. and I'm pleased with the pattern along the horizontal. It's easy for me to get worked up over perfect symetry and getting my work to line up exactly alike, one side to another and an exercise like this is good because it reminds me that a carving is viewed by the eyes as a whole, not as it's individual cuts and sweeps. You can get to close to some of these things, it's good to step back and let go from time to time.


Well let's home that this gets me going and I'll be back to regular programing again. Until then . . .

Ratione et Passionis
Oldwolf

Thursday, February 16, 2012

Reason and Imagination


"Reason is the natural order of truth; but imagination is the organ of meaning"
C.S. Lewis


At a recent visit to the Milwaukee Art Museum I ran across these great gaming boxes and boards. They are from the 1500's. Ebony with Mahogany and Ivory inlay.


I've been working on finishing up my current project, a carved bible box out of mahogany. I was thinking about a different take on it when I started looking at this piece in a different way.


What do you see when you look at this piece? What are the details that jump out and speak to you?  In a while I will show you what detail I saw after I looked at these pictures several times over.

Ratione et Passionis
Oldwolf

***

One more note,, I'll be spending Saturday in Milwaukee at The Woodworking Show, I attended last year and had a great time, especially getting to meet and visit with Andy Chidwick and his great family. I'm looking forward to this year as well, I'm fixing to pick up a couple turning tools and hopefully some spalted maple stock, beyond that I'm looking forward to seeing and hearing from presenters like Roland Johnson of Fine Woodworking Magazine and Tommy Mac from Rough Cut TV.

If you have a chance and have one of The Woodworking Shows visiting near you I suggest you take and afternoon and spend some time. You won't regret it. And if you are in the Milwaukee area and you recognize me wandering around the floor. Stop me and say Hi. I'd like to meet you.

-Derek


Wednesday, February 15, 2012

When Inspiration Surfaces

I was a little stuck. I needed to carve another bible box and I needed ideas and inspiration for the carvings that make these boxes so unique. With my previous attempt at one of these boxes I took the front Fleur De Lis pattern directly from Peter Follansbee's article on carving and building a bible box. I am very happy with the way that one turned out but this time around I didn't want to copy from as much as be inspired by.

In the end I didn't completely pull this off, but I'm happy with the results at any rate.

I wanted to show the pieces and carvings I took inspiration from and share the journey.


It really began with seeing this joined chest in the pages of the book "American Furniture: Understanding Styles, Construction, and Quality" by John T Kirk. (The Star Trek fan in me can hardly handle that name without saying something like "Dammit Jim I'm a doctor not an Anthropological Ornithologist) For whatever reason I was drawn to this opposing hearts pattern.

At it's basic shape it's a riff on an "S" curve pattern, and I started to play with drawing the form and it evolved in my sketchbook.


 The original idea I settled on was to carve a double repetition of the pattern you see on the graph paper. Now I went and decided on my stock. My day job kept me from making a timely visit to my hardwood dealer, so I eventually made a visit to the closest home store. I was unimpressed with the oak in the stacks, severely unimpressed, eventually I settled on the species that passes for mahogany. I've used it before and it carves nicely as long as you have the a good section of board. I tried to pick as carefully as possible.

The width of board limited me somewhat so before I started laying out the carvings on the stock, I cut some paper to width and saw how much stretch of board I would get. I didn't get a picture but the result was very out of proportion length of board in relation to it's width. Much more length than I wanted. So it was back to the drawing board for me.

For my money, one of the best places to go for inspiration and just a general photo collection of 17th century carvings and furniture is Peter Follansbee's blog Joiner's Notes. After a little while cruising around his site I fell upon this picture.


A "S" curve flanking a central circle. Now there was a great idea. I decided to go with it and try it out on another larger piece of paper.


Now I was much happier with my proportions, I decided to go ahead and start carving. I cut my stock, planed it flat and smooth, and marked things out using a pair of dividers and a scratch awl.


This is eventually where things ended up. The hearts turned out differently, but things like this take on a life of their own once you starts.

From the front of the box I moved on to the side panels, Here is where I stumbled a bit. As I was looking through pictures on Peter's blog I came across this shot of a box he keeps under his bench to hold some odds and ends.


I fell in love with the carving. I had to do my own take on it.


I carved a pair of these panels to flank the front panel, but when I attached them using traditional rabbets and nails I decided to turn the carvings upside down from the presentation Peter used.


The nails I used are from Horton Brasses and are called Wrought Head Nails. they simulate blacksmith made nails and they really look great. I used the 1 1/2" variety (N-6).

I shiplapped a couple pine boards to make up the bottom of the box and moved on to carving the lid.


More on carving the lid next time.

Ratione et Passionis
Oldwolf

Saturday, February 11, 2012

Inspiration.

For me it all started with a simple idea. I wanted to learn to carve, by hand, with chisels and a mallet, instead of what I had done up to that point in time which was technically tracing pencil lines with a rotary tool.

The dremel carving on this boarded chest is effective in appearance but the process is distinctly less fulfilling. 
I looked at several books and none of them made sense, or really even covered in depth the carving I wanted to do. Not that I could have clearly explained what I wanted, but I knew I had no interest in rendering three dimensional fish from bass wood (a common theme I saw in several books). I wanted to adorn the case pieces I was building and neither fish nor basswood figured into that in my mind. 

Then I floundered onto Peter Follansbee's blog "Joiner's Notes" (Another fish reference!) and found something I had been looking for. Geometric patterns that could be simple and complex all at the same time, historical reference for the carvings he was doing, domestic hardwoods like oak and walnut, and case pieces from boxes to chests. I was able to finally point at something and say, "There...that is what I want to learn to do." 

Then Peter came out with a DVD packed with carving instructions and I was shown the path I had been searching for. But there was so much more down the path that I wasn't expecting. I think Peter is a clever man and along the way to learning to carve in a 17th century style, I also found my self becoming enamored with the furniture it adorned. 

This was always the type of carving I wanted to do. 
Earlier this week I took my eldest daughter, who is home schooled, on a field trip of her own design. We got up very early in the morning and drove across the state to visit some museums in Milwaukee. I'll admit I influenced this decision some, I knew the Milwaukee Arts Museum held a sizable collection of furniture from the Chipstone Collection that I had always wanted to see.

I was blown away seeing several of these pieces in person. These pieces carry a power and permanence that sets them apart. I have grown up looking and and being around good and bad versions of furniture, from Shaker to Craftsman, from Queens Anne to Art Deco, from Modern to Federal, and most everything in between. And to my modern eyes, these "old" pieces looked fresh and new. You just don't see pieces like this around. I have to admit that I have become completely smitten with the style and I am becoming interested in exploring it more completely on my own. 

The real revelation for me was not completely held in seeing chests from this period. 


Nor in seeing the joined chests. . .


Nor was it in seeing wainscott chairs.


I had seen these types of pieces in photos before. 

The piece that grabbed me was this simple little table, with a gate-leg and folding open tabletop. 


I didn't know that anything like this was around from that period, and for me it awoke in my mind the idea that this style of Joyned Furniture could be more than historical pieces, it could be furniture you could fill a house with. At around 28" in height it would make a great end table or bed side table. 

Then later, in a different section of the Museum I saw this table in a painting of a tavern scene from the same time period, and now an idea started to germinate in my mind. 


 For a while I have wanted to take the next step from bible boxes and try my hand at an actual joined chest. I think I may just take it another step further after that. Why not a couple Wainscott Chairs after some joined stools? Why not that small folding table? Why not a full sized tavern table? Why not explore the form as much as possible? 

What a rabbit hole of inspiration Mr. Follansbee has help open for me. I only hope I get the chance to thank him in person someday. 

Ratioine et Passionis
Oldwolf


You should check out Peter Follansbee's Blog Joiner's Notes 
You should also take a look at the Chipstone Collection's Page
You should also take a look at Peter's New Book from Lost Art Press written with Jennie Alexander and called "Make a Joint Stool From a Tree: An Introduction to 17th Century Joinery" and pre-purchase it (like I did) so you can get free shipping.